March program on card weaving

Needed Supplies:
It may clear up any confusion. I will precut the thread, and the cards to save time. If I do not get the cards labeled you can quickly do that at the meeting OR before you come. We will make a simple 6 card design. If you want to make your cards, cut squares from cereal boxes and gently round the corners. Squares can be most any sizes, but I used 2.5 inches square. You may BUY cards and a belt shuttle if you wish- The Woolery has 25 cards for $5.50 plus shipping. I learned on cards made from manila folders.
For this class I will have stations, 6 cards per station and I will precut the thread. Tools needed: Scissors, a pencil with an eraser, black fine point marker, small ruler (can use a piece of paper marked to measure the width) belt shuttle (can use a table knife and paper shuttle for now), coloring pencils, large safety pin or yarn holder- I have markers and some coloring pencils to share.
History: Program: Tablet or Card Weaving:
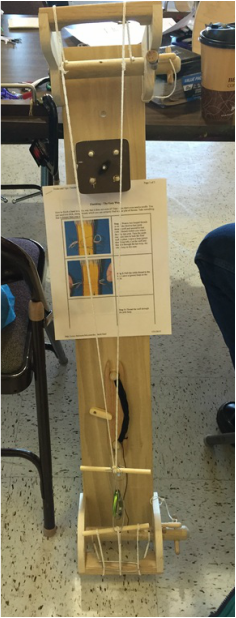
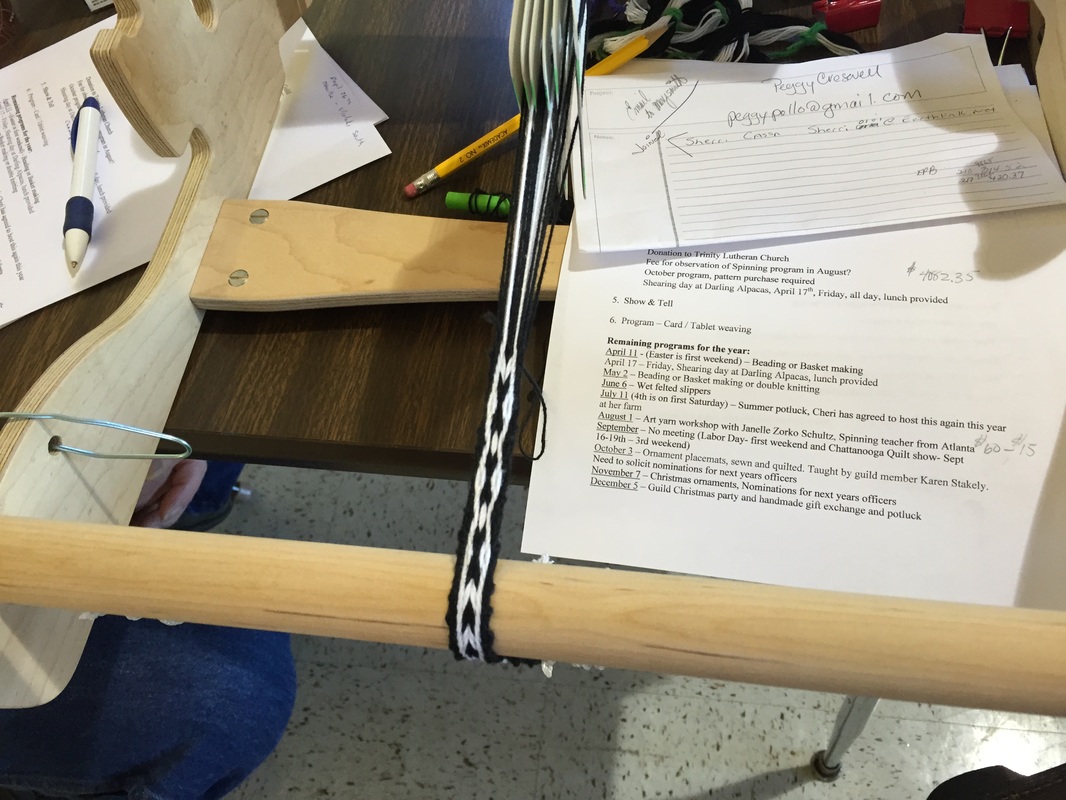
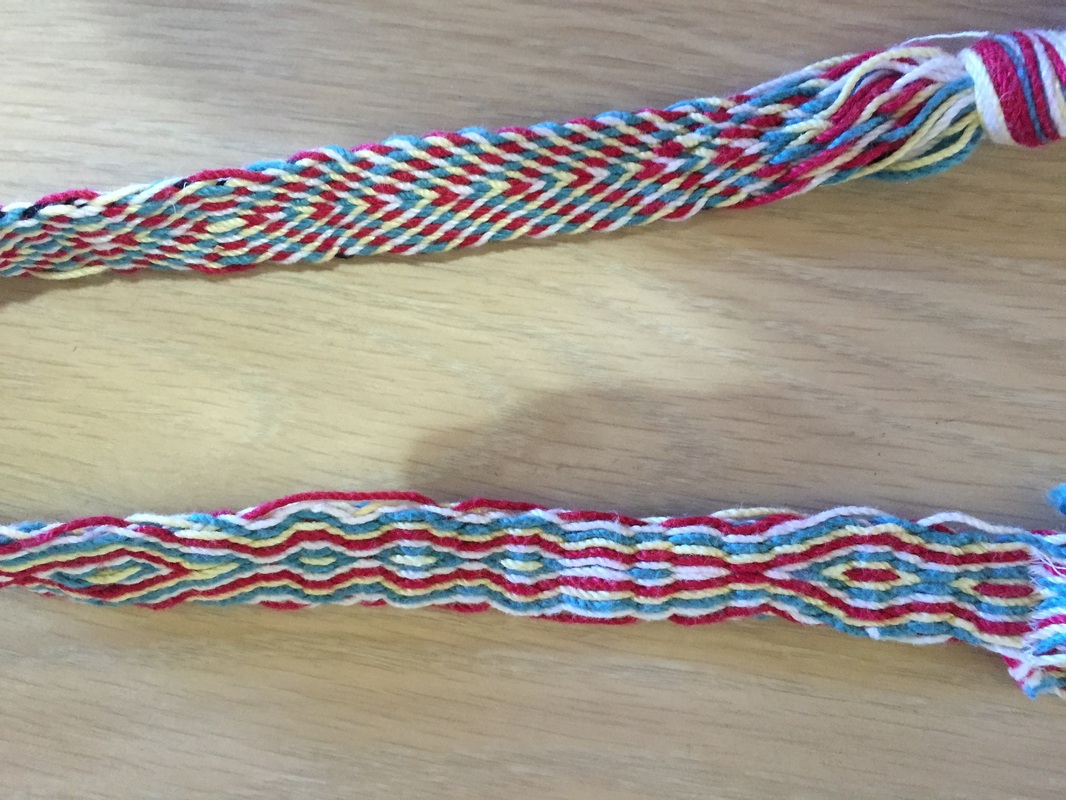
The history is sketchy-some authors credit the origin in Egypt, others deny that Egypt has the earliest evidence. At the end of the nineteenth century a German scholar started analyzing weavings, and wrote a book that sparked interest in this type of weaving. Tablets made of bone, shell, leather, wood, and other materials were lying on shelves in museums just gathering dust. Suddenly these items were recognized for what they were, dusted off, and exhibited! As scholars exchanged information it was discovered that this type of weaving was still going on in isolated parts of the world. This method was widely popular thru the 16th century everywhere except Australia, the Americas, and South Africa. Many pieces were before 1200 BC. In Scandinavia weavings were traced back to the Celtic Bronze Age. In the tomb of Queen Asa, 850 AD a complete loom with 52 cards and a partially finished band were found. According to one article, tablet or card weaving was introduced to the US in 1920’s but forgotten until 1960’s. Another author stated that it was used in the 17th and 18th centuries, evidenced by the tablets found, but who knows! Woven strips have been used for trim on clothing, straps, girdles for elephants, decoration for the priests, etc. Some have been sewn together for larger pieces. Tablet weaving is a WARP faced weaving technique, meaning that the WARP is dominant, and the weft is barely seen. In a traditional loom it is the weft that is evident. There are many ways of supporting the weavings, from an inkle loom, a door knob or tree, attached to the belt of the weaver etc. We will be using a cabinet door handle secured on the table by C clamps and a weight at the other end. The beauty of this process is that it can be done at a very low cost for materials. Thread can be perle cotton or crochet thread #3 from any craft store.
This is a BEGINNING class, very simplistic, but plan to stay for as long as you can. Before you come go on pinterest and or YouTube to view the different weavings. John Malarky has a good site, www.malarkycrafts.com/. Please view some of these sites prior to attending if possible.
Definitions of terms used:
Draft- graphic pattern
End - the cut end of the thread Fell - the leading end of the weaving created by the last pas of the shuttle
Tablets- cards-made of cardboard-will have holes at corners. Turning these cards will create the sheds.
Take up - When yarn or thread goes over and under as in weaving, more thread is used than if the thread went straight across flat. Try weaving a piece of yarn over and under your fingers. The thinner the threads (fingers) the less take up is needed. Thicker or bulkier yarn takes up more. This amount must be added to the length cut to weave.
SHED the space between the threads making a place for the shuttle (weft) to pass through. When the cards are turned, the shed changes. WARP- the long threads-as cards turn the warp twists Waste-the yarn or thread that is used to tie onto the ends. NOT actually used in the woven product. This amount must be added to the length cut for warp.
WEFT- goes from right to LEFT! Locks the twist in place. This is a WARP weaving. The weft (on the shuttle) is hardly evident-the WARP shows. Yarn-Smooth, strong cotton;( perle cotton, crochet #3) avoid fuzzy yarns if possible.
DRAFT - the pattern drawn with number of cards used indicated;
a. Direction of threading (each card has 4 holes and EACH hole gets its own thread! All threads in ONE card MUST go the same way.
b. Card number-use a pencil-so it can be erased.
c. Card hole letter indicated.
d. Colors added to aid threading
e. Count –number of each color thread The pattern we will use is shown below-count the number of cards, and each has 4 holes-so 4 separate threads for each card. This pattern has 6 cards. 6 cards x 4 holes =24 ends of threads. card # hole letter 1 2 3 4 5 6 A o o B o o o o C o o o o D o o Threading direction T S S S Z Z Z Count 12 dark 12 light Key o dark light Turning Sequence FFFFBBBB
Turning sequence You can turn the cards toward you or away from you-the number of cards turned, the direction, and the number of turns create a large variety of patterns with the same threading. Cards are usually turned one quarter turn each time. If no sequence is given this is the assumed sequence.
THREADING (T) The direction of the thread going through the hole in the card. If one hole is threaded wrong it will NOT turn! This is shown in different ways, depends on the author! a. S or Z b. arrows indicating the direction the thread goes thru the card: some go left or right, some up and down-depends on the author. The pattern we will use is shown below-count the number of cards, and each has 4 holes-so 4 separate threads for each card. This pattern has 6 cards. 6 cards x 4 holes =24 ends of threads. This pattern has 12 of each color. Threads should be cut the same length.
Allow for WASTE (area that cannot be woven) and take up. IF a thread goes up and down as it passes over and under the warp, it TAKES up more thread than if the thread was straight. Place cards in a stack numerically with # 1 on the top. Follow the threading, drawing out about 10 inch inches. Place the #1 card face down when threaded. When all four holes are threaded, tie these four threads together and place #1 card face down. Continue until all cards are threaded. The length will be 24 inches 24 Take up=12” 12 Waste= 36 times 20% = 7.2 Total length to be cut is______ _43.2_ inches. For the class in March the threads will be cut for you.
CAUTION! Never leave cards unsecured-do not leave threads unsecured! Do not leave threads under tension for extended time


